


Measuring Guide
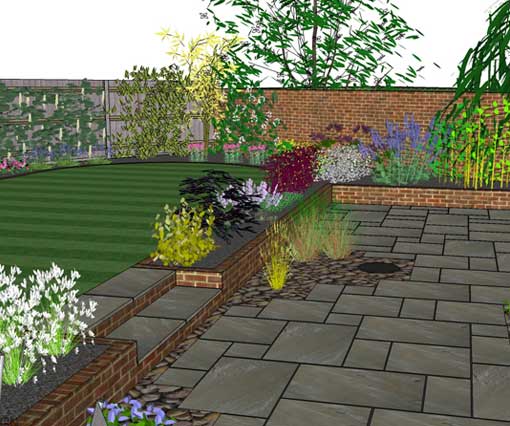
Measuring your garden using the measurement submission sheet is easier than you might think. Below is a step by step guide to measuring your garden with examples to demonstrate the measurements required and how to make them. This will help with awkward features and shapes and should enable you to produce quick accurate dimensions.
Remember - the more accurate the measuring, the more accurate the design!
Step One
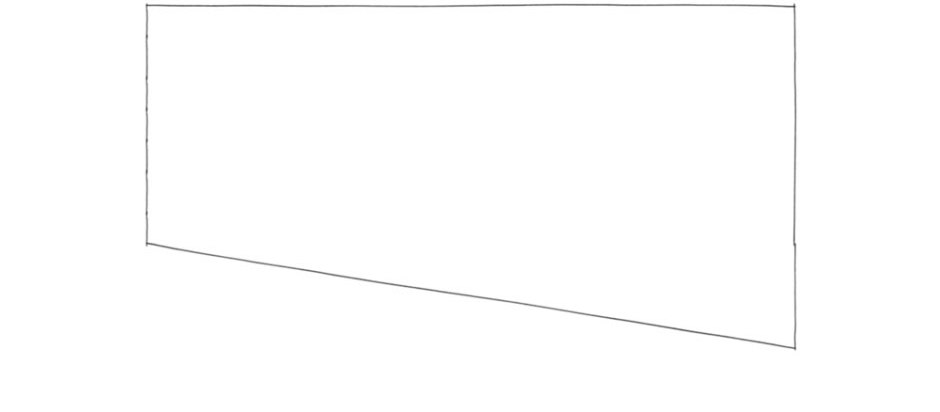
The first job is to sketch out the layout of your garden onto the enclosed Measurement Submission Sheet (MSS). If possible, try to make this sketch proportional to the garden so that it looks like a birds eye view of the area.
Step Two
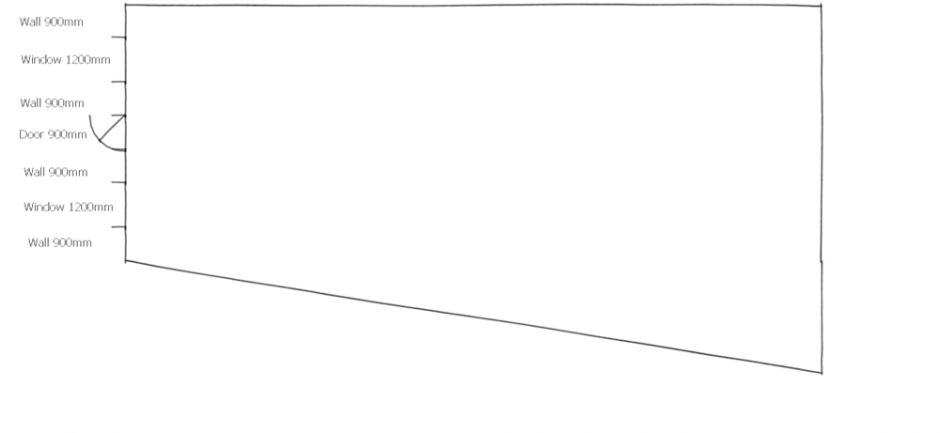
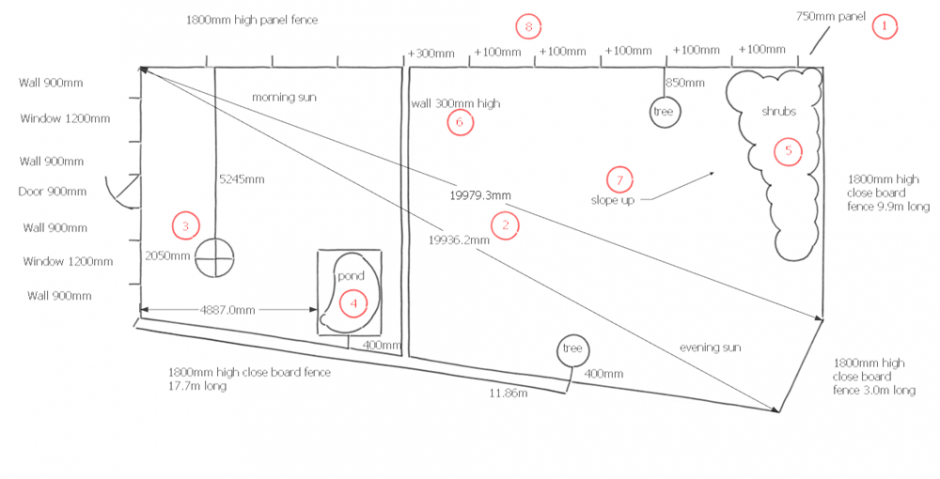
Next, measure the house and mark on the MSS each length of wall, window or door. These can be labelled to add clarity. You can also show which way doors open using an arrow.
Step Three
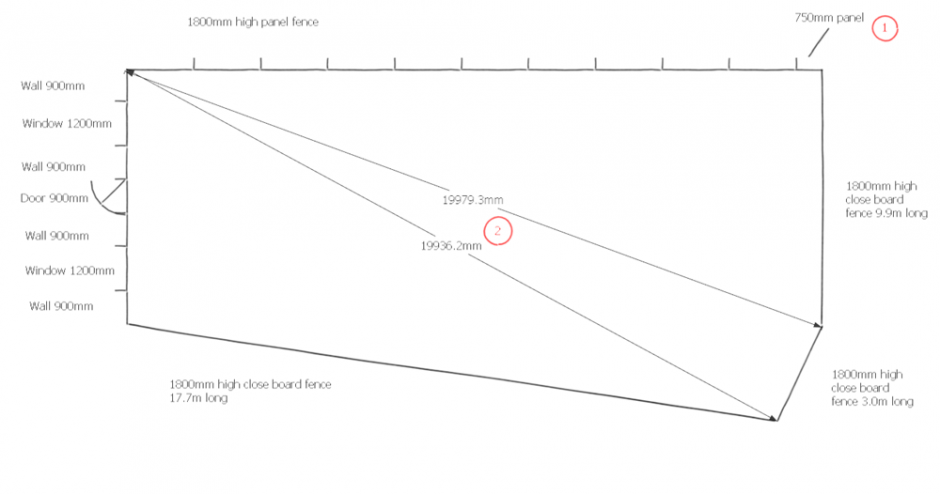
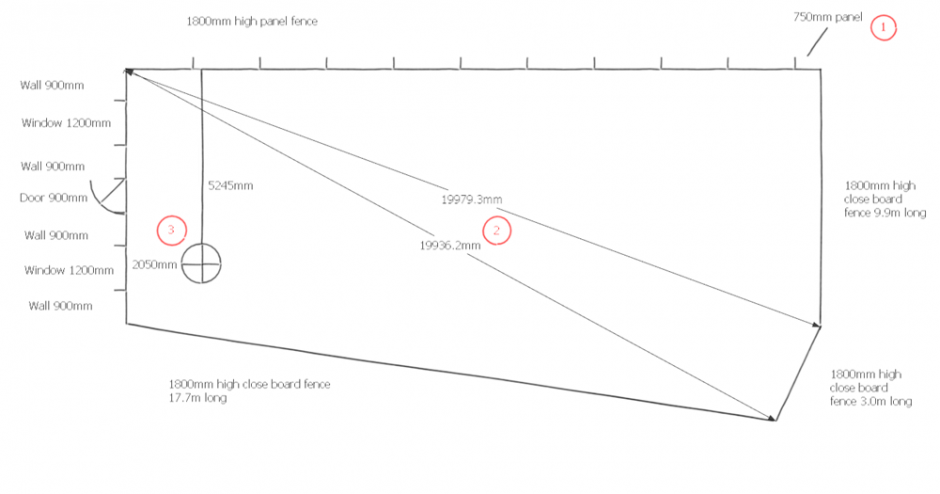
Now add the boundaries by either measuring the whole length or if the fence is built using regular panels, by measuring one panel and then drawing the correct number of panels onto the mss. If any panels are shorter than normal, these will need to be measured and shown on the drawing. (1) If the boundary has angled sides, choose two points within the garden and measure from these to the angled corner to determine its exact position. (2)
Step Four
Drain covers should be shown as either circles or rectangles with a cross inside and should be measured from two different directions to locate its position. (3)
Step Five
Next add other features in the garden that are being retained (don’t show items that are to be removed). These again can be measured as a distance from the house or a boundary fence and if possible measure from two different directions to plot its exact position.
Step Six
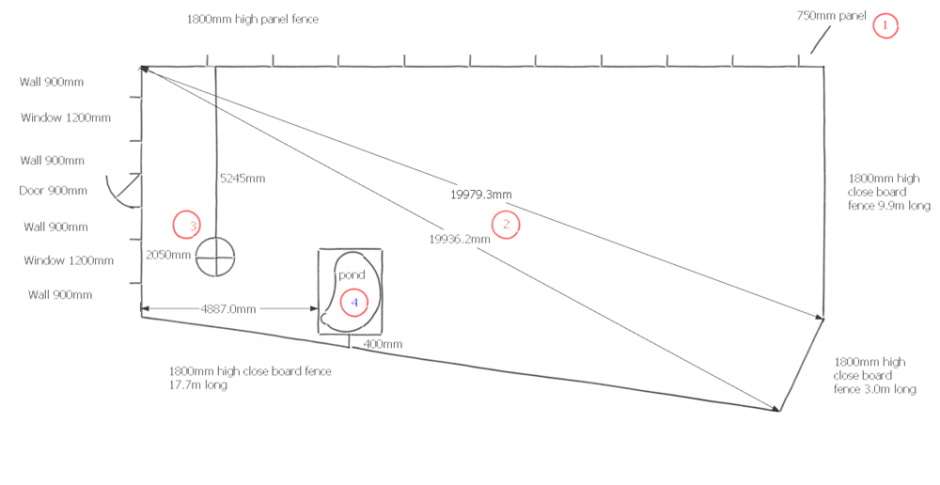
Items that are an irregular shape (such as the pond in the example) can be treated as a rectangle or square to make the measuring easier. The overall size of the item is measured followed by the position measured from two different locations (in this case the wall and fence). A rectangle or square can then be drawn in this position. The shape of the item can be drawn as accurately as possible within this rectangle or square. (4)
Step Seven
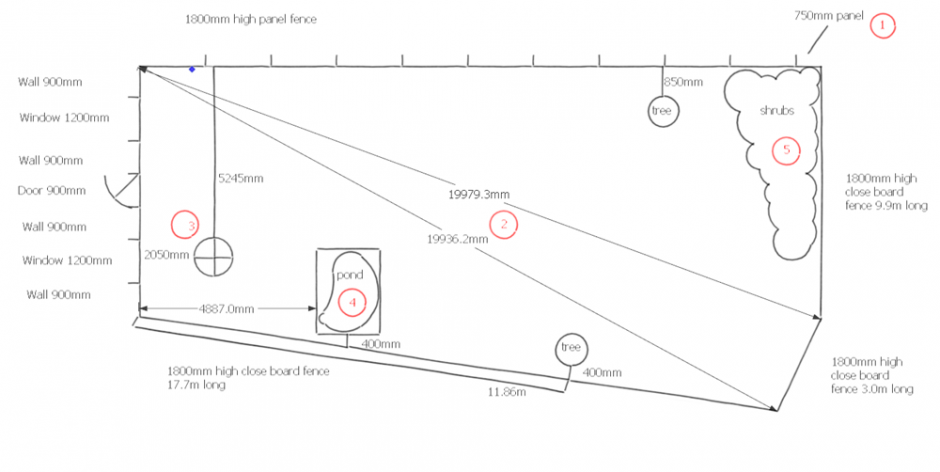
Features such as planting can be shown by relating their position to the fences (if there are any) behind. In the example the area of shrubs extends one and a half panels along the side fence and three quarters along the rear fence. (5) Don’t worry if you are not sure of the names of the plants or trees, photographs may help me identify them although sometimes this can be very difficult.
Step Eight
Features such as planting can be shown by relating their position to the fences (if there are any) behind. In the example the area of shrubs extends one and a half panels along the side fence and three quarters along the rear fence. (5) Don’t worry if you are not sure of the names of the plants or trees, photographs may help me identify them although sometimes this can be very difficult.
Step Nine
If you have any circular features in the garden these should be measured showing the diameter of the circle and the location of the centre measured from two separate points.
Step Ten
If possible, include two or three photographs of the garden as this will help enormously with both the drawing and the design. Do also include any notes that you might think are relevant to the design or layout as this may also prove useful. These can either be sent with the MSS or e-mailed to info@postalgardendesign.co.uk with your reference as the subject.
Step Eleven
If you have specific ideas on items you would like and where you would like them, please indicate this on a separate sketch plan so that these can be included on the design.
Step Twelve
Please indicate the position of morning and evening sun as this will help determine the positions of some features.
This will provide me with all the measurement details I need to produce your garden design. If there are any extra measurements that I might need I will contact you and ask for them specifically. I can of course be contacted at any time to assist with this measuring should the need arise. You can either e-mail or phone me from here. Good luck!